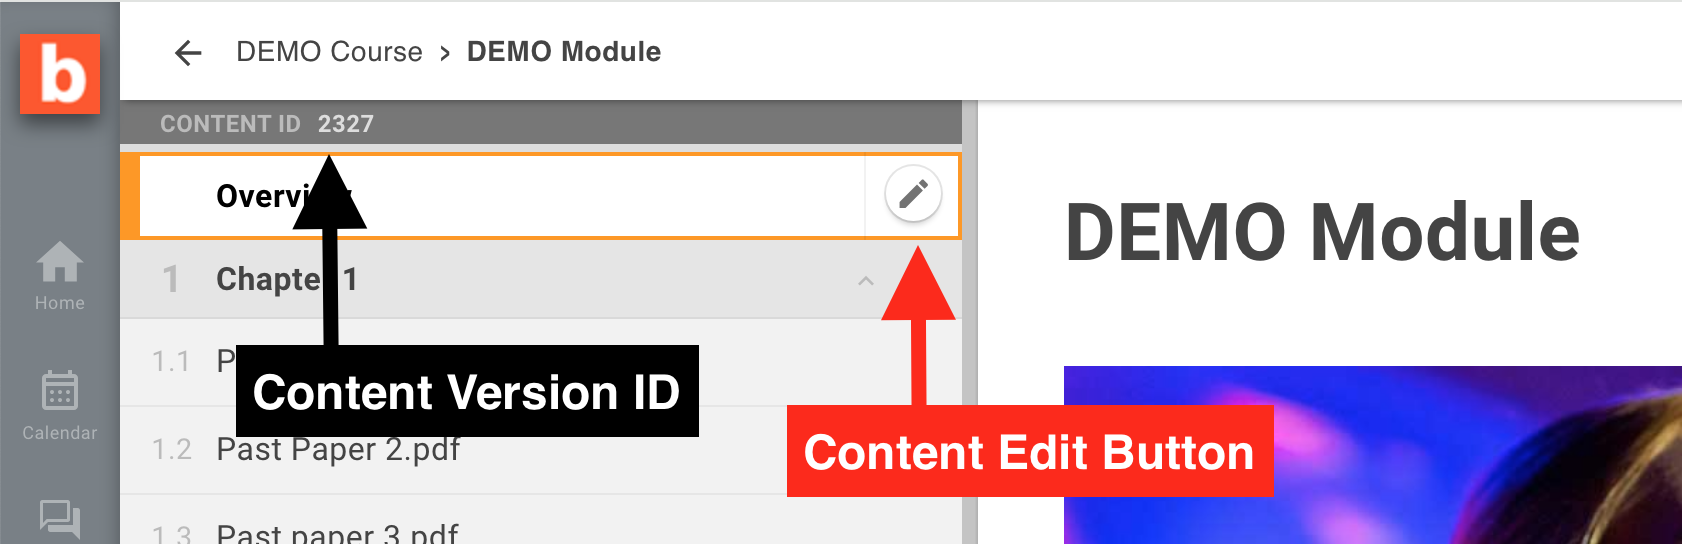
When looking at the Content page for a particular Class and Module, the Table of Contents on the side of the page shows the Content Version ID and an 'Edit' button.
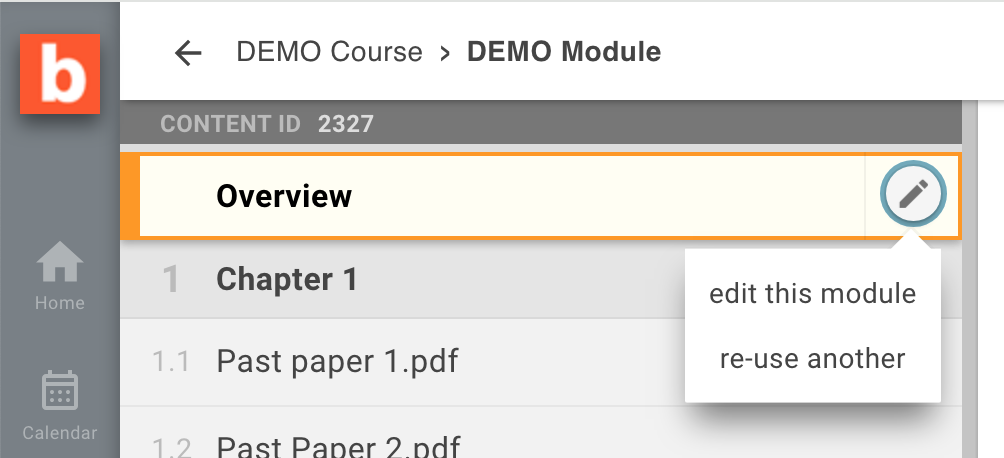
If the button with the Pencil icon is not there... it means that we are not the owners of this content; in this case we can still share content with our class by posting in the Class Channel (see the page for Class Channel in the documentation).
Clicking on the Edit button we have the choice of editing this content version, or switching to a different version.
Each version of course content for each Module consists of ONE Syllabus and ONE OR MORE Chapters.
The Syllabus should be used to include a summary of the Module's content and any additional information which should be made available to the students registered in this class; the syllabus can include links pointing to external websites as well as attached files such as rubrics, assessment criteria, guides, examples of assignment submissions, etc.
The Syllabus can also be left empty for modules where all of the above is not required, in which case students will only see the cover image for the Module. Note that the Module's cover image is not version-specific and can only be changed by an Administrator or the person who created the Module in the first place.
Any new Module comes with just one Chapter, but we can add as many as we like, name them anything we want, and change their order while maintaining all their content.
The purpose of the Chapters is to help presenting the content in logical sections, as well as serving as a quick way to hide content when required (see the paragraph about the Chapters visibility).
It's up to each Tutor to choose if and how to use multiple Chapters: we could literally name them 'Chapter One', 'Chapter Two', etc, or 'Week One', 'Week Two', or they could be used to group content by type, as in 'Weekly Contents', 'Assignments', 'Further Reading', etc.
Clicking on the button for 'Add Content' reveals a choice for Pages, Assignments or Files.
Having chosen one type of content we are presented with a list of the items which can we have permission to see (all the items we own, plus those that have been shared with us or which are already associated with modules we can see).
Here we can use the Search panel to find quickly what we are looking for, preview all items by clicking on their names, and finally select one or many using the checkboxes on the page to reveal the button 'Add To Chapter'.
From the same page we can also use the 'New' button to upload new files, or create brand new Pages and Assignments on the fly (as an alternative to creating all these via the dedicated interface in Resources).
Once any content has been added to a Chapter it will show green in the Pages / Assignments / Files list, so we know that this has already been added. If any item is added to the wrong Chapter it can easily be dragged to a different one.
Removing any Page, Assignment or File from a Chapter does NOT delete the original item.
The defaults visiblity setting for new Chapters is 'always visible' but we can change this to 'none (draft)' or 'time-lock'.
The visibility of a Chapter affects all of its content. In the case of visiblity none, students cannot even see that the Chapter exists, while for visibility time-lock they can see the name of the Chapter but not what it contains.
Chapters can be set to self-publish automatically after a number of days or weeks from the start of the Class.
Having this time-lock based on time elapsed rather than a particular calendar date means that we do not have to go and enter dates at the start of each new Term.
The times used for the time locks are always calculated from the official start date for the Class.
It may happen that our first lecture takes place only a couple of weeks from the official Class start date, in wich case we must be aware that a Chapter that was locked for 'three weels' will actually become visible in our second week of lectures. In this case we can either change the settings for each time-locked Chapter, or ask an Administrator to change the Class start dates to reflect the schedule of lectures.